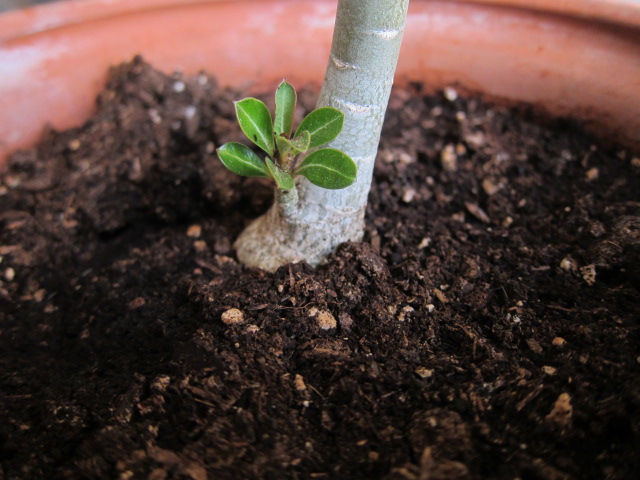
 You’ve probably noticed on my previous post that I had a small tiny Kalachuchi plant growing in my Balcony Garden. The Kalachuchi plant or its scientific name Plumeria was happily sunbathing in the corner of Oakley’s garden. So I did not pay much attention to it. Well that’s until I noticed a tiny little guy growing at the base of the plant. I was thrilled that there was going to be an addition to the family.
After a few days, the Kalachuchi was not showing any kind of growth. Both the main and the tiny sprout were stagnant and has not changed since I first noticed the sprout. Then suddenly like a ton of bricks hitting me.. I had the idea that maybe it was time to repot the plant.
If you all were keeping up with the updates you’ll probably notice that I already repotted the Kalachuchi into a bigger pot so it can have room to grow. Or can we say, “spread its leaves” and grow… OK was I the only one that chuckled there? *Crickets*

So I looked more into the signs that show that a plant must be repotted.
Some signs are:
- The plant has stopped growing
- The plant has slowed growth
- Roots seem to be growing out of the pot through drainage holes or the top
- Leaves turn yellow between watering
- The plant suddenly goes limp
What you may want to do if you are able to carry the plant is to slowly lift the plant out of its pot. Either by putting the pot on its side or turning it upside down and gently pulling the plant out. If the roots are growing in a circular fashion then it may be time to repot the plant.
As for my Kalachuchi plant, the growth had stop. So we knew it was time to repot it. So lets dive into “how to” or better yet how I did it. Please feel free to correct or advise with a better procedure. Feel free I would love to hear your thoughts.
Tools:
Extra Pot
Trowel
Gloves
Stones
Stuff or ingredients:
Soil
Water
 1 – I lightly watered my plants before I started any type of work. Do not over water or you’ll be just playing in the mud. You’ll want to water the plant just enough so the soil is moist. This will help keep the soil together and not crumble as soon as you touch it.
2 – You’ll want to make sure your extra pot is clean. If you’re using a used pot then you’ll want to wash it before you use it. Reusing pots may transfer bad material, virus, bacteria, etc. So you’ll want to make sure it’s clean. Keep in mind you may want to go up in size gradually. Example would be a plant in a 4-inch pot should be transferred to a pot no bigger than 6 inches. If the plant were to be transferred to an 8-inch pot then the plant may not grow properly. The theory behind this is that if the roots have plenty of room for it to grow. The plant will concentrate on growing its roots rather than what is on the top of the soil. Interesting right? Think of the iceberg that sunk the Titanic.
3 – Place a couple of stones or broken pieces of pot at the bottom of the pot. This will help prevent the soil from running through the drainage holes. There are a few people that argue that this may actually stunt the growth of the plant. By adding stones it limits the growing space for the plants roots. I’ll try to touch on this subject in the future.

4 – Place a layer of soil at the bottom of the pot. Not too much.. You’ll need room for the plant itself.
5 – To remove the plant from its current pot. You’ll want to lay it on its side or turn it upside down. If you plan to turn the plant upside down to remove it from its pot. You’ll want to place your hand at the top of the pot and let the stems go through your fingers. Basically you’ll be cupping the plant. Lightly tap around the plant to loosen it from its pot. Hopefully, the plant will slide right out but if it does not slide out. You can use your trowel and run it along the side inside the pot. Be careful, you do not want to damage the root ball.
6 – Once the plant is removed from the pot, gently loosen the roots so they are not tightly woven. You’ll want to let the roots spread out a little.

7 – Place the plant in the new pot and start filling with more soil. Keep the plant in the center of the pot and add soil along its sides.
8 – Gently pat down the soil but not too hard. Enough so that the plant is steady in its pot and not loose. You may need to add more soil as you do this.

9 – Water the plant.
10 – Breath.. and tell yourself… “That was easy!”
All done! Pretty easy right? Well I thought so…
I would love to hear what your thoughts are. Any advice? Any corrections? Anything..

Sources:
Dummies: Steps for fool-proof repotting
Guide to Houseplants: Repotting House Plants: When, Why, and How-tos
Lowes: How to repot plants into larger Containers
Thank you for sharing how to repotting the kalachuchi... It helps me how to do it perfectly by following your step by step procedure.God bless and keep it up. 😊
ReplyDelete