Thursday, December 6, 2012

Rooting Experiment Update 12/05/12

It’s been awhile since I updated everyone with my rooting experiment. This is the experiment that I am hoping that I can take a couple of cuttings from some neighborhood plants and somehow have them miraculously grow roots. You may be thinking that I’m insane but I tell you I’m not. I’ve done some research and it’s possible. Possible for me.. well that’s another story.

On a previous post I explained how I sterilized sand. If you haven’t seen that post you might want to glance over it. Well that is if you want to try your own experiment but if you are not.. then read on my friend read on… Oh just to let you know after I started this experiment I read that beach sand is not ideal for rooting a cutting. So I thought I could have started over but my stubbornness got the best of me. So I proceeded with the beach sand.


With this experiment I used an aluminum tray that I found laying in the street. With some soap and water I was able to clean it nicely. This is where I placed the sand and prepared it for the rooting experiment. Don’t forget to pop a couple of holes at the bottom of the tray. This will help drain the water when you do water it.


Here are the steps that I took to prepare the seedlings:
1 – Cut a couple of pieces from the plant. You will want about a few inches of the plant. You’ll want to cut right where the leaves are growing out.
2 – From the area that you made your cut, clear the bottom of the stem from the leaves but saving a few at the opposite end.
3 – Then you’ll want to burry the cleared section into the sand.
4 – Wait.


Well good job. You’re ready for the make shift green house. I got the idea from a video, which I’ll post a link too. But basically I used a white trash bag and a couple of spoons that I used from my plenty visits to the local frozen yogurt shop. I used the spoons to help prop the plastic bag. So the bag does not just lay on the plants itself.

Once you planted the cuttings, you’ll want to water the sand. Do not over water the plants. You’ll want it moist and not soaked.


Place the tray into the plastic bag and tie it up. Place it where it will not be bothered. I placed it in an area where it’s mostly shaded but it does get some sun. Now just wait.
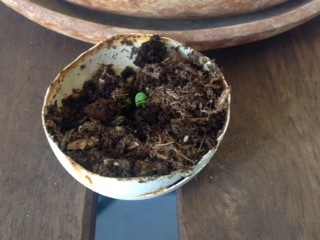
As for week 01:
The plants haven’t rooted yet. From the photos you can see how moist the plants are.


Week 02:
No roots for this week. The stems have turned a dark brown.

Week 03:
No luck this week. 

This stem looks like it’s a goner.

Week 06:
I left the experiment alone for a couple of weeks. I felt that I was disrupting the rooting process due to my constant pulling the plant out. So after a couple of weeks I did a quick check up. Here are the photos:

Did you just see that? You may be asking what you are looking at or what am I looking for? It’s a white little root growing from the stem! Yes! Success! It actually rooted and it is growing.

When I pulled the first one, I saw something that wasn’t there before. So I looked closer and noticed that it was a small root. Sad thing I placed it back into the sand I felt a slight tug and I noticed the root had been broken off.

The 2nd stem when I pulled I felt it was well rooted into the sand. So I tugged and heard a crack. My guess is that I had broken off a couple of roots but luckily there were a couple of roots still.

My lesson… I have to be careful! Well I hope you enjoyed the read. I’ll keep everyone updated with these guys.

Here is that link to the video I used as reference:
MikesBackyardNursery

Friday, November 30, 2012

Herb Balcony Garden Update 11/30/12

So it has been about 2 weeks since my herb balcony garden update. The weather here in Los Angeles has been kind of cold and wet. Besides from being sick and the occasional rainfall, my garden has been growing at a snail's pace. You’ve probably read some of my previous post on repotting my Kalachuci plant and splitting the snake plant  that I did not know I had. So the garden is evolving as we speak. You may be asking yourself, to what? I’ll be honest I’m not sure what yet.

Wednesday, November 28, 2012

My steps to splitting a snake plant from my balcony garden


So after a couple of hours of searching the Internet. I was ready and wanted to dive into it… or should we say divide into it.. split into it… part into it.. oh I think my jokes are just getting worse


Tuesday, November 27, 2012

Splitting a Snake Plant

It’s been about a year since I’ve live at my lovely apartment.  Everyday I would walk along the corridor  and head straight to my balcony garden. Everyday I would attempt to show off to my love and tell her “I started these basil plants from seeds and look at them now!” I marveled how my limited spaced balcony garden was doing so well. I found a new passion and I was thrilled of my little plants. Hold up before I start going off on this.. it wasn’t like a beam of light descended from heaven. It was more like “Wow this is pretty cool. Oh I have to try that” So no glorious moment here but a light bulb turning on.

Wednesday, November 21, 2012

Repot.. Repot.. Repot that Kalachuchi in the Balcony Garden

You’ve probably noticed on my previous post that I had a small tiny Kalachuchi plant growing in my Balcony Garden. The Kalachuchi plant or its scientific name Plumeria was happily sunbathing in the corner of Oakley’s garden. So I did not pay much attention to it. Well that’s until I noticed a tiny little guy growing at the base of the plant. I was thrilled that there was going to be an addition to the family.

After a few days, the Kalachuchi was not showing any kind of growth. Both the main and the tiny sprout were stagnant and has not changed since I first noticed the sprout. Then suddenly like a ton of bricks hitting me.. I had the idea that maybe it was time to repot the plant.

If you all were keeping up with the updates you’ll probably notice that I already repotted the Kalachuchi into a bigger pot so it can have room to grow. Or can we say, “spread its leaves” and grow… OK was I the only one that chuckled there? *Crickets*

Monday, November 19, 2012

Cold...Fever... BLAH!!

Hi everyone,
Well I'm just sending a note out there.  I'm still around!  I just been MIA due to a really bad cold, fever, or something that just took me out for a week.  I'm recovering but a few lingering coughs and sneezes arise occasionally 
As I was trying to recover, I always had Oakley's Garden in mind.  With paper and pen in hand, I came up with a list of things to do.  So be prepared to be over loaded with tons of posts.
I'm back and ready to report!

Friday, November 9, 2012

Plants are dying!!! WHY?!?!?

My plant is dying! Is this it for my rosemary plant? Is it going to the big balcony garden up above? Oh wait maybe it’ll be a huge yard. What is causing my plant to die? I thought I was watering it properly and giving it all the sunshine it can handle. Even though I do those things it just won’t come back to me.


Wednesday, November 7, 2012

Update Tuesdays on a Wednesday!! 110712

It’s time for UPDATE TUESDAYS of my thriving, well some dieing, balcony garden. Oh wait but today is Wednesday. I know I’m a day late posting my Update Tuesday report. But I promise you I did take these photos on Tuesday, I just did not post it till now. But let’s not dilly dawdle anymore and get to it.

OK so here’s the scoop on Oakley’s garden. Some of the plants are doing really well from what I can tell. Here is the family photo:

Monday, November 5, 2012

Balcony Garden, Eggs and Basil.. SEEDLINGS!!

Hello everyone! It’s been awhile since I’ve updated you with my balcony garden and the eggs and basil seeds experiment. I have been meaning to keep you updated but there are so many things I want to blog about. I don’t think there is enough time to write it all down. Now I understand how blogging itself can be a full time job! I salute everyone that is able to blog everyday.

OK back to the eggs, basil, and my balcony garden update! Oakley and I are so proud to announce that we have seedlings sprouting! Yes it worked beautifully without any effort. As you probably read on a previous post, I was able to grab a couple of seeds from my basil plant. After some research, I thought the idea of sprouting the seeds from an eggshell would be fun and a useful reuse of eggshells. Just in case.. click here to read the previous blog on what steps I did. Back to what I was saying, I DID IT!

During this experiment I tried 2 different procedures. I kept 1 egg out in normal balcony conditions. What I mean by normal is that I kept it out with other plants. The rosemary plant shaded the eggs because I was afraid it would be too much sun. I watered it every other day and just kept an eye on it. I was sure not to over water it. Most of the time I sprinkled it with water just to make sure the soil was moist.

The 2nd procedure was a “Mickey Mouse” job. I pretty much tried to recreate a green house effect by keeping the egg in a plastic bag. I pretty much place the egg in a carton that I placed into a plastic bag. I sprayed some water just to have some kind of moisture. It was a really poorly attempt to build a mini size green house. I didn’t even take photos of it.. maybe on my next post I’ll show you.


I have to say.. I did notice a difference in the plants. Here is the first basil plant grown in “normal” conditions. You’ll notice a small leave popping out from the soil. When I saw this I was so excited! I actually picked the phone and called my loved one at work. Ha Ha. But here is a tiny plant starting to grow. From the looks of it, she’s going to be a shy one.


As for the 2nd plant, you can really notice a difference! Look how tall these babies are. They really stretched out and were not shy at all. Looks like these boys are going to be strong. Look, there are 4 seedlings.. I hope this does not cause over crowding.


By the way, I did try another seedling in a small container. I wanted to see the difference in growth. In this photo you’ll notice a slight green dot on the top right corner. Take a good look or you’ll miss it. It looks like something is growing but this one may be too young to come out and play just yet. Let’s give him a couple more days.


I have to admit it is so rewarding to see the little seedlings! It all started as a little seed and now little seedlings. I could only imagine when they become full grown plants! I’m so excited.. actually my family is a little excited also. They already claimed the plants… but but but.. they’re my babies!  So I started a couple more!  Woo Hoo!


Tuesday, October 30, 2012

Balcony Garden Update Tuesdays 10/30/12


It’s Tuesday and it’s time to do my Tuesday’s update with my balcony garden. At first I was not too sure if I wanted to share the update with any readers out there. Then I thought, this is why I started the blog in the first place. I wanted to share my progress in building a balcony garden. I wanted to share the triumphs of harvesting any flowers, herbs and even vegetables. I want to seek advice for my failures of wiltering flowers, dying plants or even disaster experiments. So either good or bad I should share my experience.


Saturday, October 27, 2012

Sterilizing Sand for my Balcony Garden

As you already know, I'm on my way to experimenting on rooting some of my neighborhood plants.  Rooting is a process of getting cuttings to grow roots for you to plant.  It sounds difficult and it is.  But let's start by sterilizing sand.

Friday, October 26, 2012

Trash? I think not..


Ever since I've started my balcony garden.  I have been trying to use.. or more like reuse things.  I believe we all have things that we can reuse for another propose.  As in bottle jars can be reused for storing food, a coffee can reuse as a pot for a plant.. the list can go on.  There is the saying, "One man's trash is another persons treasure."  Well I found someone’s trash and it was my treasure.  Someone threw out a perfectly fine crate today.  Luckily I saw it and quickly grabbed it.  It fit perfectly on my balcony as a storing shelf.  It's perfect.. thank you to that anonymous person that had no need for it and threw it away.  Now I doubled my space.
I know it's a simple thing but I feel good to be able to reuse something.  I wonder what you have reused?  What's the most creative thing have you reused?  I would love to hear about it.  Pictures would be great also.. I'll be sure to post here for everyone to see.  Thank you and keep reusing.  


Wednesday, October 24, 2012

Sterilize Soil for my garden?

Sterilize soil?  I bet your asking yourself, "sand is dirt, it's suppose to be dirty".  Of course being the "need to know why" type of person.  I looked up why do we need to sterilize soil if it supposed to be dirty.  From what I gathered, most commercial products puts its sand through a process that sterilizes the soil before it is sold in stores.  They do this to get rid of anything that is not wanted in the dirt.

Balcony Garden Update Tuesday


Well it's about 2 weeks since a started my balcony garden. I can remember like it was yesterday. I stepped out onto my balcony while I sipped my morning brew. I gazed upon 2 dwarf trees down at my knees. The calamansi has a sweet smell coming from the delicate white flowers. The single fruit hangs on by a twig on the lemon tree. It calls to be picked or does it just want to show off its bright yellow color. I stand there, imagining.


Monday, October 22, 2012

Neighborhood walks.. plants everywhere!

As I walk Oakley through the neighborhood, I start noticing more and more plants that I haven’t noticed before.  Oh my left I see Lavender, on the right Jasmine, straight ahead birds of paradise, oh wait behind me is an odd looking plant that I have never seen before.  My mind starts to imagine how my balcony garden would look like with the different plants that I see in the neighborhood.  As my mind starts imagining, I start picturing a plant hanging here and there, a plant below me, one behind another.  I move some vines to the side and see an endless row of strange and beautiful plants.  I look around and I’m standing in the middle of a jungle… POOF!  Then I snap back to it and Oakley is looking at me oddly.

Friday, October 19, 2012

Baked Fish with rosemary and garlic

I've been really itching to use my rosemary herbs from mybalcony garden since day 1.  There are so many delicious recipes over the Internet to choose from.  So I rolled up my sleeves and picked up my cutters and spatula.  It’s been a week and it is time to enjoy the rewards of a balcony garden. 

For my first recipe, I choose to use the rosemary herb.  It’s one of my favorite herbs that has a scent and taste that cannot be comparable to any other herb.  Rosemary has a somewhat sharp pine aroma that lends to a very flavorful taste when cooked with.  My face cannot help but smile when the kitchen fills with rosemary scent as I add it to any dish.

Tonight I’m cooking Baked fish and potatoes with rosemary and garlic.  This is the first time I tried this dish but it was quickly added to my favorite list.  This recipe called for white fish, and so I tried two different types of fishes.  I made another adjustment that you’ll find out soon enough.  Now let’s get to the good part.

Thursday, October 18, 2012

My Balcony Garden Update

Hi everyone!  It has been about 1 week since I started this blog!  My balcony garden, which is rosemary, basil, calamansi bush, meyer lemon tree, and mint.  Thank you to all those who are giving me great advice and those to just blog their ideas and practices.  With the Internet, it seems that I have unlimited resources to pull from.  Sometimes, with so much information, I get bogged down and almost get lost to, what to do?  If one person says do this and another person do that.. which advice do you consider?  

Monday, October 15, 2012

Eggs, Basil, and a Balcony

Eggs, basil and a balcony sounds like a great idea right?  I love eggs topped with some fresh basil while enjoying it on my balcony.  Don't worry I'm not going to go in detail what I had for breakfast this morning.  To think about it.. my previous post was about the benefits of coffee grounds.  It's either I'm a huge breakfast fan or my ideas come to me while enjoying my breakfast.  While I sit on my.. ha.  Sorry I'm going off topic.
So this post is not about what I had for breakfast but on a creative way to getting your seeds to sprout.  I think it's a great idea which I saw on youtube.  As I browsed youtube for tips and advice on growing your own herbs and plants.  I stumbled upon Ramona Werst and her basil garden.  I'll put a link on the bottom for anyone that wants to see her video.  

Saturday, October 13, 2012

Coffee and Plants?

As I sip my morning coffee to wake my groggy self.  I search ways to give my plants the nutrition that it needs.  I'm really hoping to save my plants from the depths of the ground... wait.. it belongs in the ground.  So the depths of... OK I'll have to think about this.


Friday, October 12, 2012

Calamansi Flowering

It looks like my Calamansi is flowering and ready to bare fruit!  

Thursday, October 11, 2012

Umm do I really know what I'm doing?

So we all say, try new things.  We say get out and do something different.  We all want to add spice to our lives... or is that something we just say?  Well, instead of just saying I'm going to do.  Do it.. right?  Blog.. sure, why not... umm do I really know what I'm doing?  Haa.

So call me adventurous or call me daring.. call me what YOU will.  I'm trying two new things for the first time.  YES!!!  Instead of stepping into the lake with one foot, I'm jumping into the lake with both of my feet.  ACK!  Hold up.. wait.. let me think about this.  Ha.

OK, so two new things I'm willing to try.  First, I'm going to start a small garden on my balcony.  Yup that's right I'm going to use these brown thumbs and try to grow something.  I've always wanted to grow a small garden.  In the past I've had a couple plants: 

-Small green house plant - DECEASED
-Indoor palm tree - DECEASED
-Spider plant - started looking sick so I took it outside - DECEASED
-Cactus - DECEASED!!

So I don't have much luck, but I'm willing to try again.  Sorry, I do have to give warning "plants have been or will be hurt during the making of this blog."  Sorry everyone!  

First off, here is a picture of my plants so far: 


On the left is a tiny lemon tree.  I cheated, I got this from my love.  The middle plant is a rosemary bush.  Next to that is a rare plant called Calamansi plant.  It bears a really sour fruit which I've used in place of lemons.  It's a very popular plant in the Philippines.  To think about it.. I like sour fruit.  Haa.. maybe because I'm a sour person?  
The furthest is a basil plant that's barely hanging on.  


I took this from my parents.  Originally it was mine but it was dying.  My dad who has a green thumb took it and somewhat revived it.  But I decided that I'll do it.  My responsibility right?  With great power comes great responsibility.  Power to kill plants!!!  That's my power!!  Poor plant, my apologizes ahead of time.  

Also I inherited two more plants.


The top is a Rosemary bush.  It looks like its not getting enough water.  
The bottom is a mint plant.  Not sure what happened here.  But with the google and everyone's suggestions I hope to bring this back to life.


Well that's it!  


So here we go.. two things I'm trying today.  Blogging and gardening!  Woo hoo let the laughs, crying, madness, and everything else that comes with it, begin.  Please if you have any suggestions and advice email me... comment... link me... throw a rock against my window (remember, this a figure of speech everyone).  Let me know.. I would love to hear what you all have to say.  Thanks!!!